You already know about our latest LiquidPoll – Elementor Widget. This widget is divided into three sections – LiquidPoll – Poll, LiquidPoll – NPS, and LiquidPoll – Reaction. Meaning with the update of our core plugin, you will get three widgets in the Elementor Widget list.
Here is a full detailed doc on how you can get started with this amazing widget and enjoy all the features.
To start with LiquidPoll- Elementor Widget, you need to update your LiquidPoll Plugin to its latest version (both free and pro). To update your LiquidPoll, follow these few simple steps with us:
Step 1: We suppose you are already using our plugin LiquidPoll. Whenever there is an update available, you will find an additional option in our plugin settings “Install Plugin.”
Step 2: Click “Install Plugin” and then you will be forwarded to a Plugin Dashboard. Here you will get a notification to update LiquidPoll to its newest version.
Our latest available versions are
- LiquidPoll Free (v 3.3.53)
- LiquidPoll Pro (v 2.0.33)
Step 3: Click on Update. If you are using LiquidPoll Free, it will automatically download and activate the latest version. For LiquidPoll Pro users, you can download the latest version and then update it to v 2.0.33.
For starters who are using LiquidPoll for the first time, here’s our official doc for you.
Getting Started with LiquidPoll – Elementor Widgets: #
LiquidPoll – Elementor Widget offers an integrated widget platform to manage all Polls/ NPS/ Reaction Polls together. From here, you can insert polls anywhere on your page, change themes instantly and enjoy all the customization features that come with it.
Once you have updated LiquidPoll, go to Pages> All Pages from your WP Dashboard.
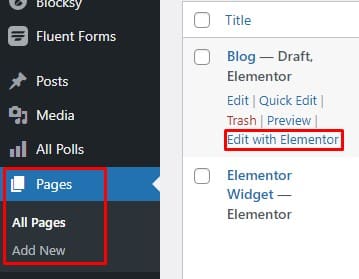
Select any page and click “Edit with Elementor”
Now, you will have a window appear before you with all the page building blocks. In the top left section, type LiquidPoll – Widget. You will see three different widget options appear before you:
- LiquidPoll – Poll
- LiquidPoll – NPS
- LiquidPoll – Reaction
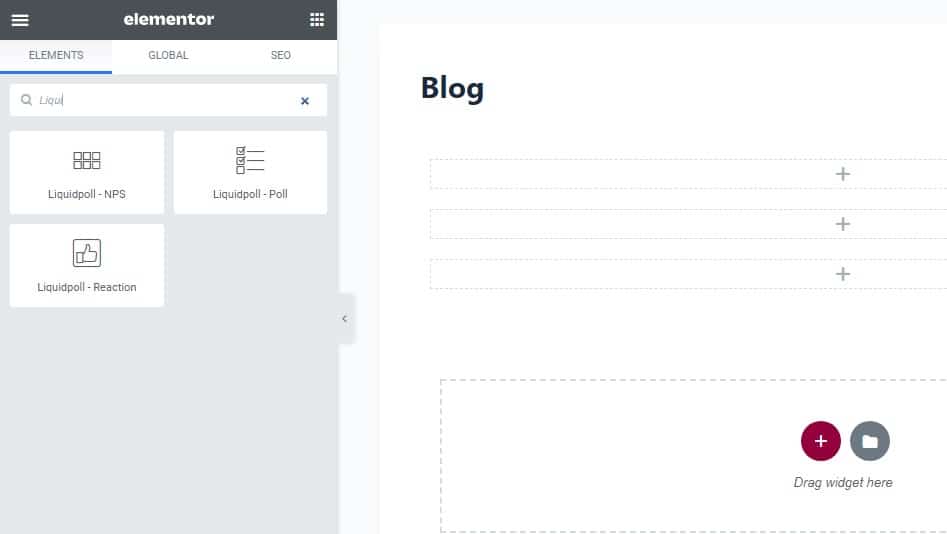
Drag and drop any widget to your page and add a specific Poll/ NPS/ Reaction Poll. We are working on a reference page – Blog here. Our page is free of content or any kind of visuals.
Note: With LiquidPoll Widget, you can not create new Poll/ NPS/ Reaction Polls. This feature-rich widget ensures you can drag and drop any Poll and customize them as you like. LiquidPoll Widget is more like a Theme Changer. You can have a live preview while changing themes for any Poll/ NPS/ Reaction Poll. It’s an instant and plain process saving users all the trouble. This feature is available both in the Free and Pro versions. However, some widget options are limited in the free version. .
To insert a new Poll on your page, you first have to create a Poll from the LiquidPoll settings. To help you create Polls, here is our official doc. Once you have done it, you can select it in the same way as this video.
Explore All the Features of LiquidPoll – Elementor Widget #
Since this widget comes in three different categories, we will start with LiquidPoll – Poll first. Some Elementor features are common for all three widgets. For each Elementor Widget, we will describe the unique features.
1) LiquidPoll – Poll Widget: #
LiquidPoll – Poll widget allows you to manage all your polls from a single widget. Select LiquidPoll – Poll from the widgets. And drag and drop it anywhere on the page.
Here, you have three tabs – Content, Style, and Advanced.
Both Style and Advanced tabs are almost the same for these three LiquidPoll – Elementor Widgets. However, some styling options will be different. We will highlight that part too.
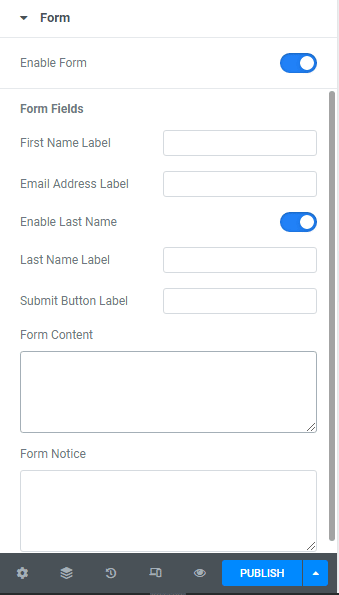
Under the Content tab, you will have two settings options here:
1) General Settings: From here, you can select any Poll and insert them into the page. Other options include Poll Content, Deadline, Countdown Position, and the generic settings from the core plugin.
2) Form: You can also enable forms from the LiquidPoll widget. Forms are available in two other LiquidPoll widgets (NPS and Reaction as well) too. Form options are similar to Plugin form settings. You can place all the form information here. But first, do remember to “Enable Form.”
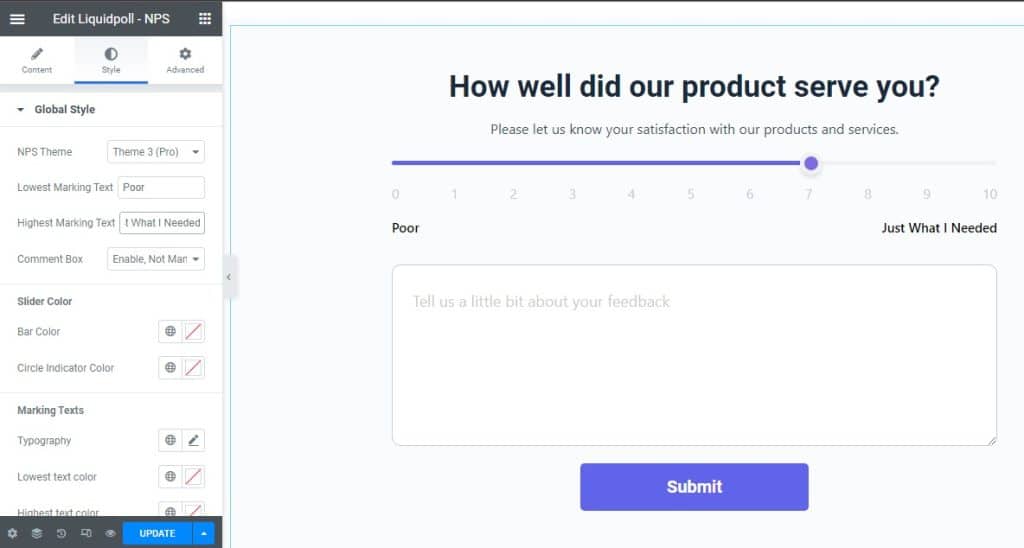
Most of the Style options are the same for the three LiquidPoll Elementor Widgets. You can change themes for Polls/ NPS/ Reaction Poll from here.
Other features include full typography and color control over text, countdown color, and buttons (margin, padding, and setting radius). You can also style forms from here.
2) LiquidPoll – NPS: #
LiquidPoll – Elementor Widgets share the same interface for any Poll type. LiquidPoll – NPS also comes with the same editing option for NPS Polls. You will find the same layouts just as we described above.
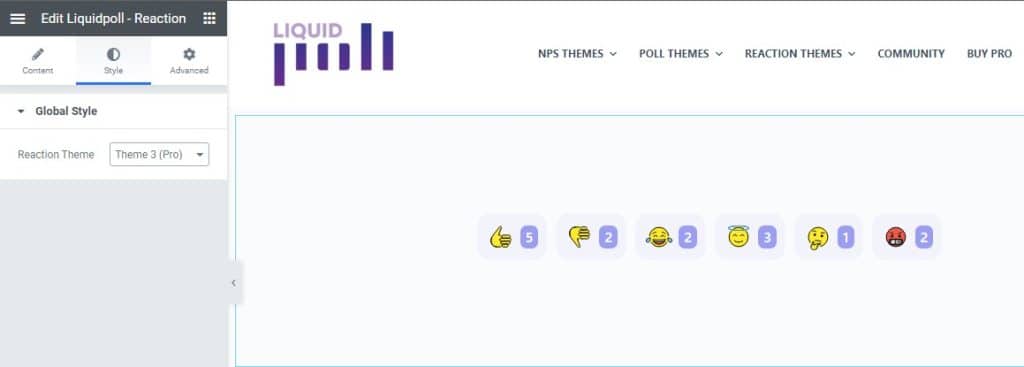
3) LiquidPoll – Reaction: #
LiquidPoll – Reaction Poll is available with LiquidPoll Pro only. LiquidPoll – Reaction Widget allows you to apply the same customizations as LiquidPoll NPS and LiquidPoll Polls. However, most of the content and styling options are limited for Reaction Polls. You can only customize the Reaction Polls in a few ways.
Advanced Options: #
LiquidPoll Widgets come with all the integrated flexibility of the Elementor Widgets. The Content and Style tabs have all the plugin features included – with some bonus options.
But the Advanced tab has the same options for all three Elementor Widgets. The editing options are:
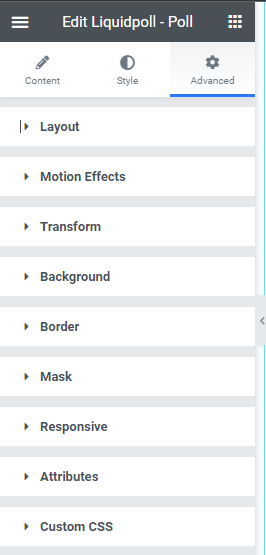
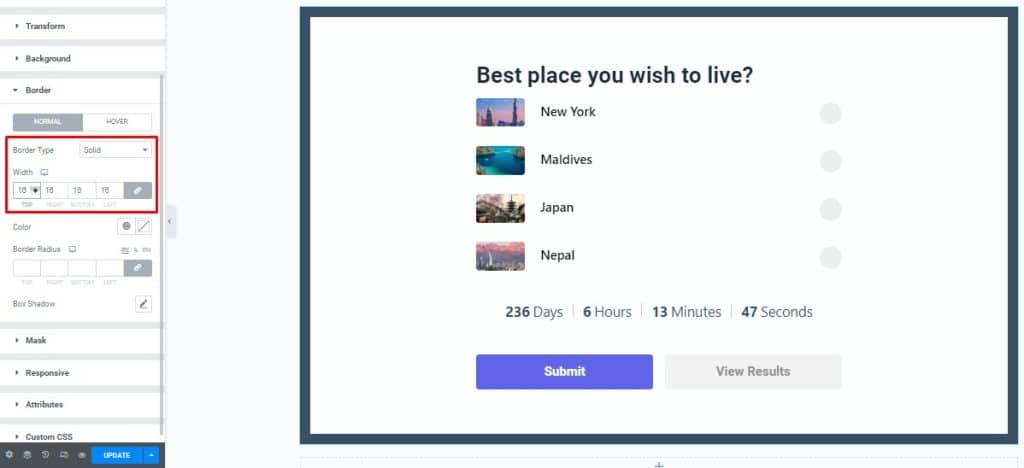
1) Layout: Change the overall layout of Poll/ NPS or Reaction polls with this option. Set up Margin, Padding, define Position, CSS ID, and Classes (if any).
2) Motion Effects: Motion Effects is a familiar Elementor Widget feature. You can add Mouse Effects, and Scrolling Effects, stick your Polls/ NPS/ Reaction Polls, and enhance Poll appearance.
3) Transform: Use this option to rotate, scale, flip, and skew Polls/ NPS, or Reaction Polls.
4) Background: Set up a background theme, activate hover-style background, and set up background color with this option.
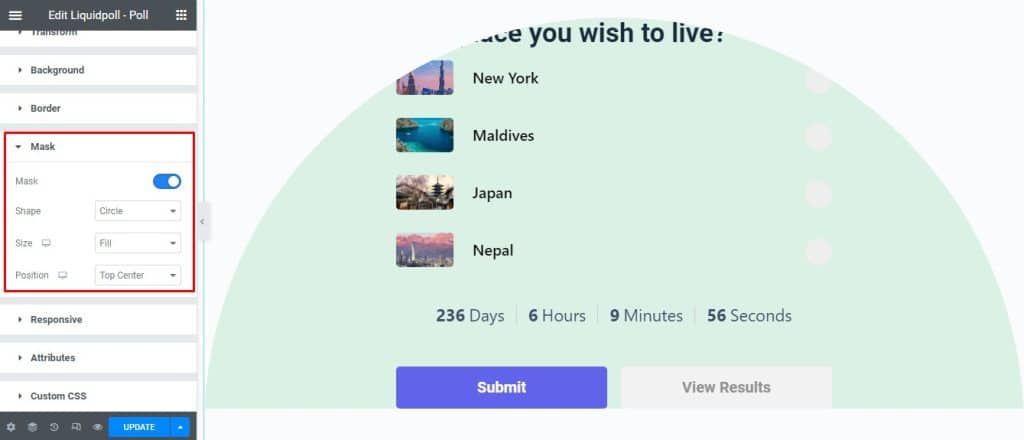
5) Mask: Mask your Polls in different ways. It’s an interesting option to improve your Polls and present a unique style for visitors.
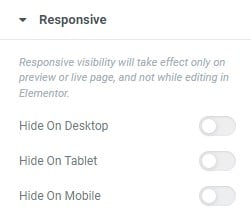
6) Responsive: With this option, you can restrict polls on different devices. Hide your polls on Desktop, Tablet, or Mobile. Do not touch these options if you want Polls to be visible on all devices.
7) Attributes and Custom CSS: Set up custom attributes for the wrapper elements. You can also use Custom CSS to target wrapper elements and interesting visuals with your Polls.
Here is all about LiquidPoll – Element Widget. We will soon have separate docs for each LiquidPoll – Elementor Widget. Stay tuned with us. If you are facing any trouble with LiquidPoll Elementor Widget, or the core plugin, feel free to contact us or open a ticket here.